

Is there anything worse than getting a flat tire on your favorite ride? As an e-bike owner, you might wonder if fixing flat tires on an e-bike differs from mending traditional bicycle tires.
Short answer: Yes!
E-bikes come with their own set of unique components, and dealing with electric parts requires some extra care. But don’t let that get you down!
Today, we’ll walk you through how to fix a flat tire on an e-bike. Covering the tools you need, precautions to take, and everything in between so you can get back to hitting those streets or trails like a boss.
Introduction to E-bike Tire Maintenance
Why E-bike Tires are Unique
So, what makes repairing a tire on an e-bike any different than repairing a tire on a traditional bike?
Some e-bike wheels are equipped with a hub motor, which means there are wires and connectors near the wheel hub that need to be considered during the repair. So, as you can see, understanding these differences is crucial. You can’t just start tearing into it all “willy-nilly” (unless you enjoy having to pay mechanics to fix stuff!)
Common Causes of a Flat E-bike Tire
Before we roll up our sleeves, let’s identify the common culprits behind flat bike tires. Understanding the causes can help you take preventive measures.
The primary villains of flat tires on an e-bike aren’t all that different from traditional bike tires and generally occur due to sharp objects on the road (or the dreaded goathead weed!). But flats can also happen because of low tire pressure or worn-out tires. It’s worth noting that because of their wider and sturdier tires, fat-tire electric bike models can be ridden on tires with lower air pressure. .
Tools and Materials You’ll Need
Must-have Tools
When repairing a flat tire on an e-bike, having the right tools on hand will make the job much easier. Let’s take a closer look at these must-have tools and their importance in your tire repair kit:
Tire Levers
Tire levers are small but mighty tools that are great for safely removing the tire from the rim without causing damage. Here’s why they’re so important:
- Ease of Use: Tire levers are designed to fit between the tire and the rim, so you can gently pry the tire away. This makes removing the tire much easier than using your hands alone.
- Efficiency: Tire levers provide leverage, reducing the physical effort required to remove the tire. This is especially helpful if you’re repairing a flat on the road or trail, where convenience and speed matter.
When selecting tire levers for your repair kit, opt for durable and lightweight options that fit comfortably in your hand. Having a set of these in your kit ensures you can safely and efficiently remove and replace the tire when needed.
Patch Kit
The patch kit is a lifesaver when fixing punctures on your e-bike tire. Here’s why:
- Economical: Patching a punctured tire is a cost-effective and environmentally friendly alternative to replacing the entire thing. Extending the tire’s life and, most importantly, saving you money.
- Convenience: Carrying a patch kit means you can quickly repair a flat tire and get back on the road, trail, or bike path without the need to find and purchase a new one.
- Compact: Patch kits are typically compact and easy to carry in your saddlebag or backpack. They take up minimal space, making them a practical addition to your e-biking essentials.
A typical patch kit includes patches, adhesives, and sandpaper. To use it effectively, you’ll need to locate the puncture, prepare the damaged area, apply adhesive, and then the patch. Most patch kits come with a variety of patch sizes.
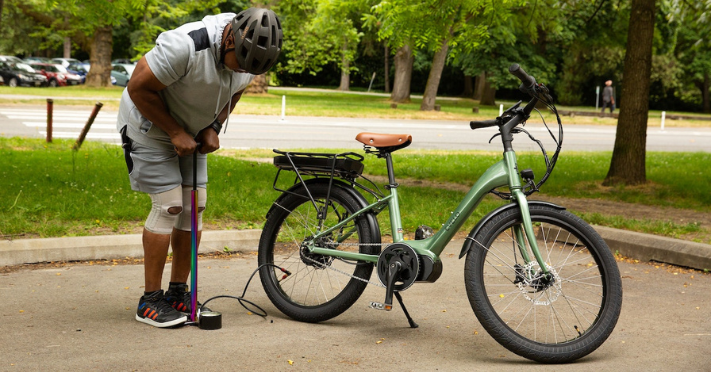
Pump
Here’s why an air pump is a must-have tool for tire repair:
- Tire Pressure: Maintaining the correct tire pressure is crucial for e-bike performance and battery efficiency. After patching a punctured tire or replacing an inner tube, you’ll need to inflate it to the recommended pressure level, typically specified on the tire’s sidewall.
- On-the-go Repairs: If you experience a flat tire while on a ride, having a portable pump with you lets you make quick repairs and continue your journey without needing additional assistance.
- Versatility: Pumps come in various types, including hand pumps, mini pumps, and CO2 inflators. Choose a pump that suits your riding style and preferences. Hand pumps, for example, offer more control over inflation, while mini pumps are compact and lightweight.
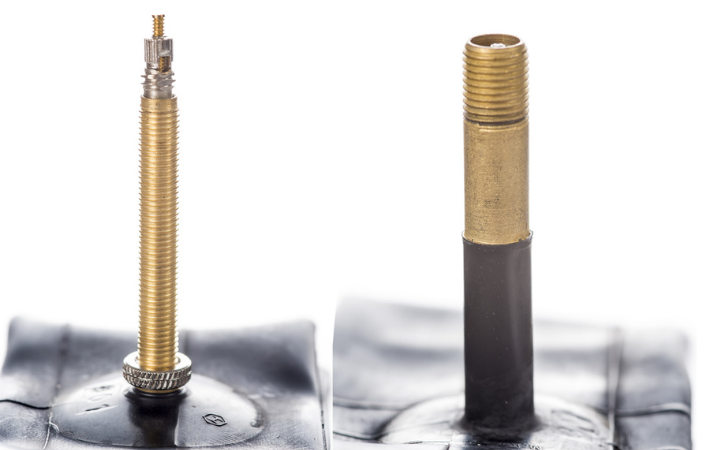
When selecting a pump, consider factors like portability, compatibility with your valve type (Schrader or Presta), and ease of use.
Here are a few more items you should keep on hand:
- Spare Inner Tube: Occasionally, you might encounter larger holes that can’t be effectively repaired. In such cases, the best solution is to replace the inner tube. It’s a good practice, especially on longer rides, to carry two spare inner tubes that match the size of your e-bike’s wheels and tires.
- E-bike Multitool: Opt for a standard bicycle multitool, ensuring it includes a fitting compatible with the axle nuts on your wheels. Alternatively, you can carry a combination wrench that suits your needs.
Helpful Additional Tools
In addition to the must-have tools, consider these optional but practical tools for a smoother e-bike tire repair experience:
Stand
Elevating your e-bike makes the repair more ergonomic by providing a comfortable working height, stability, and access to both sides of the wheel.
Wet Cloth
A wet cloth will help you detect small punctures with precision by looking for air bubbles, saving you time during the diagnostic phase.
Step-by-Step Guide to Repairing a Flat E-bike Tire
1. Safely Lay Down the E-bike
Before you begin, ensure your bike is stable. If you have a bike stand, this is the perfect time to use it.
Otherwise, carefully lay your e-bike on its side, ensuring it won’t topple over while working on it.
Be mindful of the display and controller. If your e-bike’s controller is removable, it’s advisable to remove it before laying it down on its side.
Understanding where your battery is located is also essential, as it can affect the bike’s weight distribution when placing it on a stand.
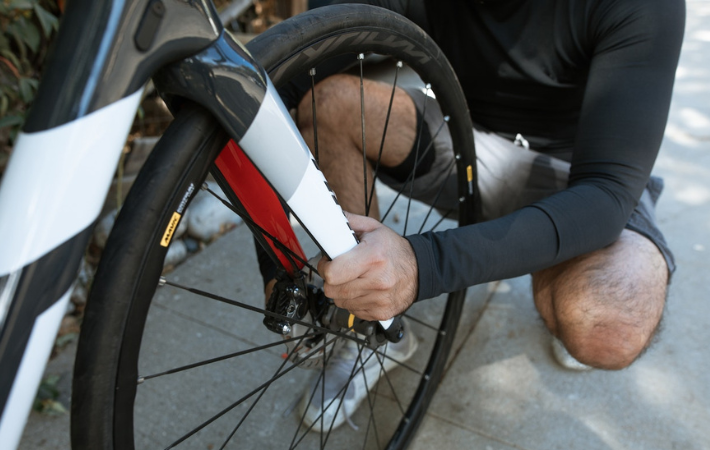
2. Remove the Wheel
To access the flat tire, you’ll need to remove the wheel from your e-bike. The exact method can vary depending on your bike’s design, but generally, you’ll need to release the brakes and loosen the axle nuts or quick-release lever. Once the wheel is free, you should be able to carefully pull it away from the frame with your hands.
A quick note on rear wheel removal: Frequently, on e-bikes with rear hub motors, wires are routed through a hollow axle tube within the wheel. Before removing the rear wheel, begin by cutting the zip ties securing the power cable to the frame. Part of this cable connects to the rear wheel and needs to be disconnected in order to remove it.
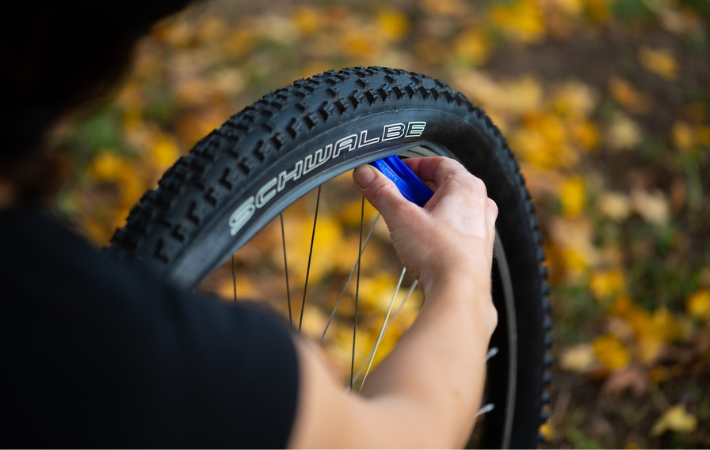
3. Remove the Tire
Now comes the fun part – freeing the tire to reach that inner tube. Here’s how:
Take the sharper end of your trusty lever and slip it between the tire’s edge and the rim. It’s a gentle yet firm operation, so opt for small, precise moves over big ones.
With your tire levers, nudge one side of the tire off the rim, bit by bit, mimicking the finesse of opening a bottle. Then, carefully reach in and extract the inner tube, paying special attention to the valve stem.
4. Identify the Puncture
Now, it’s time to find the puncture. Inflate the innertube slightly to make it easier to spot the hole. A wet cloth is handy here. Move the cloth around the tire, and when you see bubbles forming, you’ve located the puncture. Alternatively, you can spray the tire with soapy water, which really boosts the visibility of the bubbles.
5. Preparing and Applying the Patch
Once you’ve identified the puncture and confirmed it’s not along the bead, there’s no visible wheel damage, and it seems like one of your patches will cover the affected area, it’s time to patch it up:
Note: Unfortunately, if the innertube and/or tire are severely damaged, you may need to throw in the towel and spring for a new tube and tire altogether.
- Roughen the area around the hole with the sandpaper from your patch kit.
- Apply adhesive from the patch kit to the roughened area.
- Wait for the adhesive to become tacky.
- Apply the patch, ensuring there are no air bubbles underneath.
- Press down firmly on the patch to secure it in place.
6. Re-assemble the Wheel and Tire
With the patch in place, it’s time to put your wheel and tire back together:
- If you removed the whole tire, start by placing one bead of the tire onto the rim.
- Insert the inner tube’s valve stem through the hole in the rim.
- Carefully tuck the inner tube inside the tire.
- Work your way around the rim, pushing the other bead of the tire onto the rim.
- Make sure the tire is evenly seated on the rim.
- Inflate the tire to the recommended pressure, which you can find on the tire’s sidewall
- Re-install the wheel in the reverse order it was removed.
7. Post-Repair Checks
Your tire is patched, and your wheel is back in place, but the job isn’t done quite yet. Post-repair checks are almost as critical as the repair itself. Always complete the following steps to ensure that damage to other e-bike components is caught early, preventing problems that could potentially cost a whole lot more than a new tire.
Here’s what you’ll do:
- Check for any signs of damage to the electric components, such as wires or connectors.
- If your e-bike has a removable display or controller, make sure it’s correctly reattached.
- Test your e-bike to ensure it’s functioning correctly, paying particular attention to the throttle and pedal-assist modes.
Precautions and Safety Tips
Handling the Electric Components
E-bikes come with intricate wiring and electric components. During the repair process, be gentle and avoid stressing any wires. Be particularly cautious around the wheel hub area where the motor wires and connectors are located.
Importance of Regular Tire Checks
To prevent flats in the first place, regularly check your e-bike’s tire pressure and condition. Proper tire maintenance can go a long way in ensuring a smooth and hassle-free ride.
When to Seek Professional Help
While you can handle most flat tire repairs yourself, there are situations where it’s best to seek professional assistance. If you notice extensive damage to the tire, the sidewalls are compromised, or the inner tube has multiple punctures, it’s time to consult a bike shop. They can assess the damage and recommend the best course of action.
Final Thoughts
Mending a flat tire might seem daunting initially, but with the right tools, a little know-how, and some patience, you can tackle it like a pro. Remember the unique aspects of mending or replacing tires on an e-bike, be cautious around electric components, and perform regular tire maintenance to reduce the chances of flats.
Now that you’ve mastered the art of e-bike tire repair, you’re ready to hit the road with confidence, knowing that you can handle any flat tire situation that comes your way. So, patch, pump, and ride on!