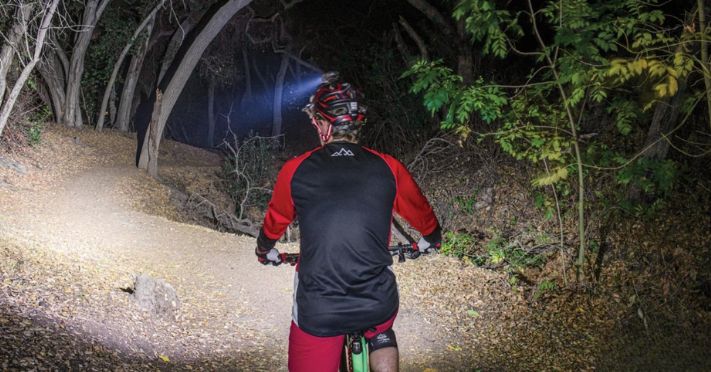

There are some major advantages to night riding. It can make you a better rider, keep you cool in the summer, teach you to take new lines on a well-known trail, and can extend your riding schedule when there is a time change. Let’s kick it off with a basic light buyer’s guide.
1. Light It Up
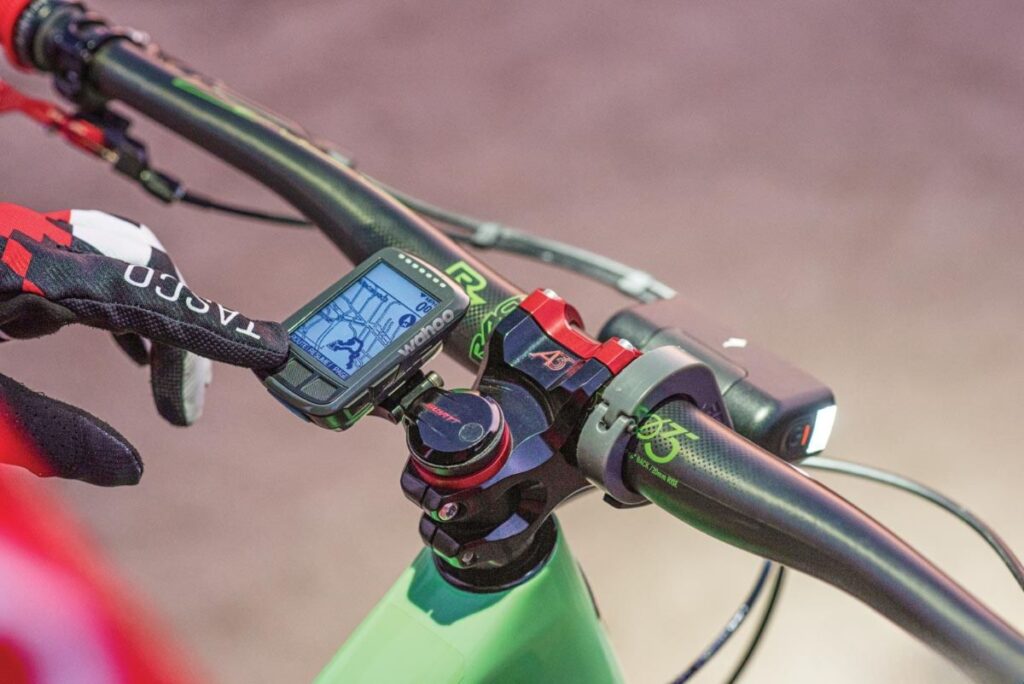
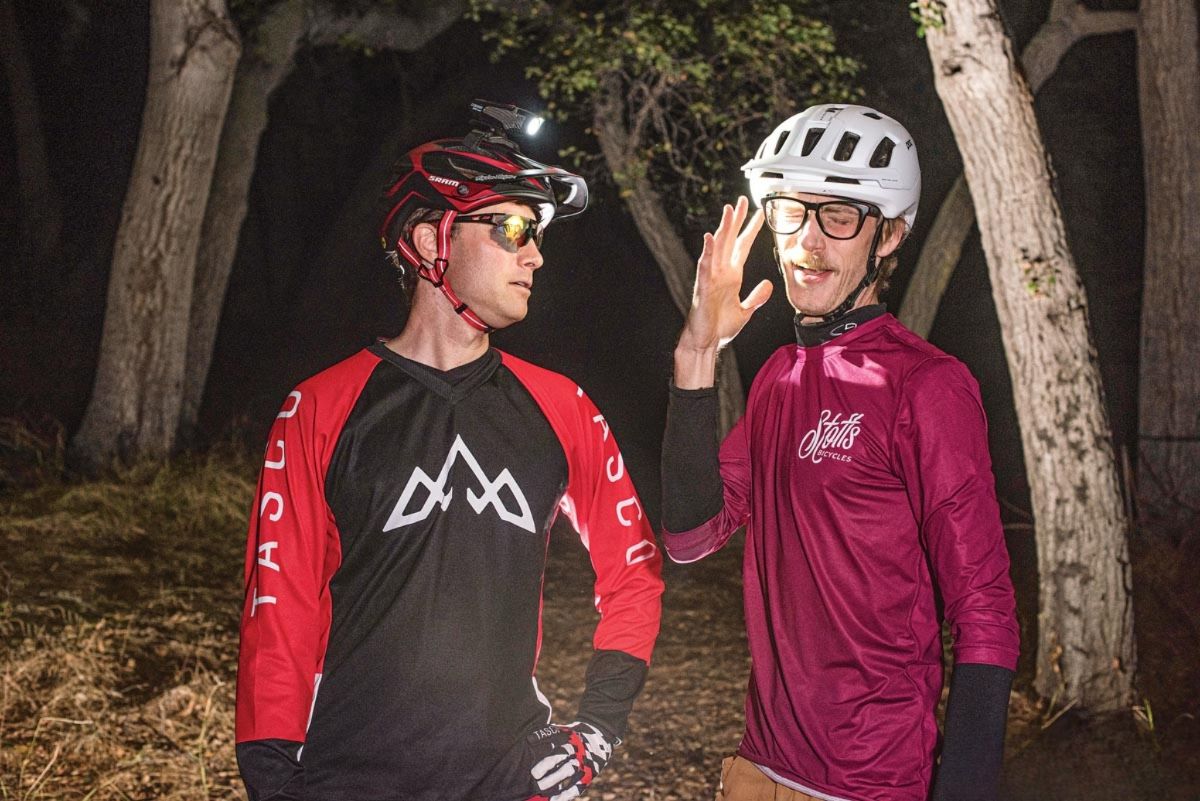
We recommend using two high-powered lights that are designed for off-road use. While taillights are a must when popping onto the road, we rarely use them on our mountain bikes at night to avoid blinding a following rider. We typically mount the highest power on the handlebar and another powerful but lighter-weight option on the helmet.
The handlebar light is best for illuminating the trail in front of you, and the lower-profile helmet light will allow you to point your head to see over obstacles and around corners and to fill in the shadows caused by the bar light. Here are a few lights on the market that we have used and recommend checking out.
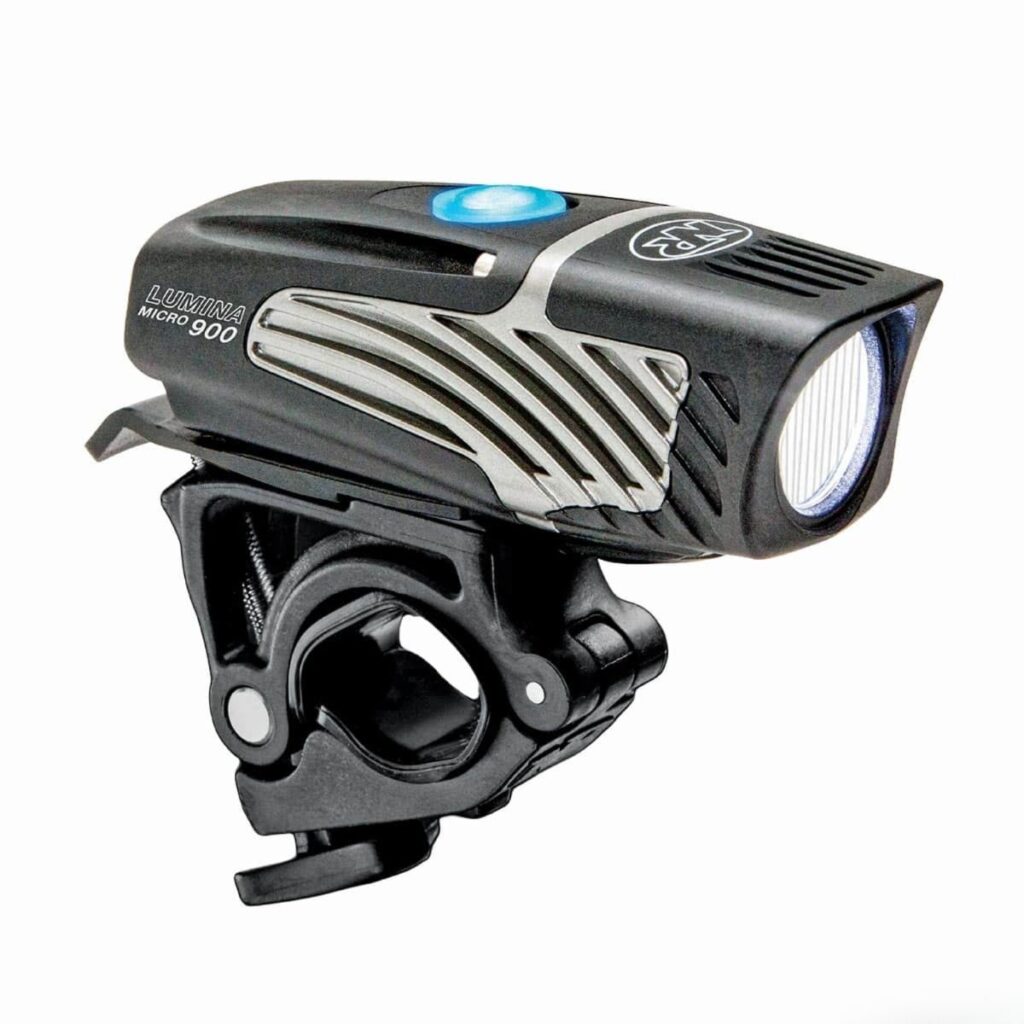
- RUNTIME: 2-60 hours
- WEIGHT: 130g
- USAGE: Bright enough for your bars and lightweight enough to be mounted on a helmet
- PRICE: $74.99
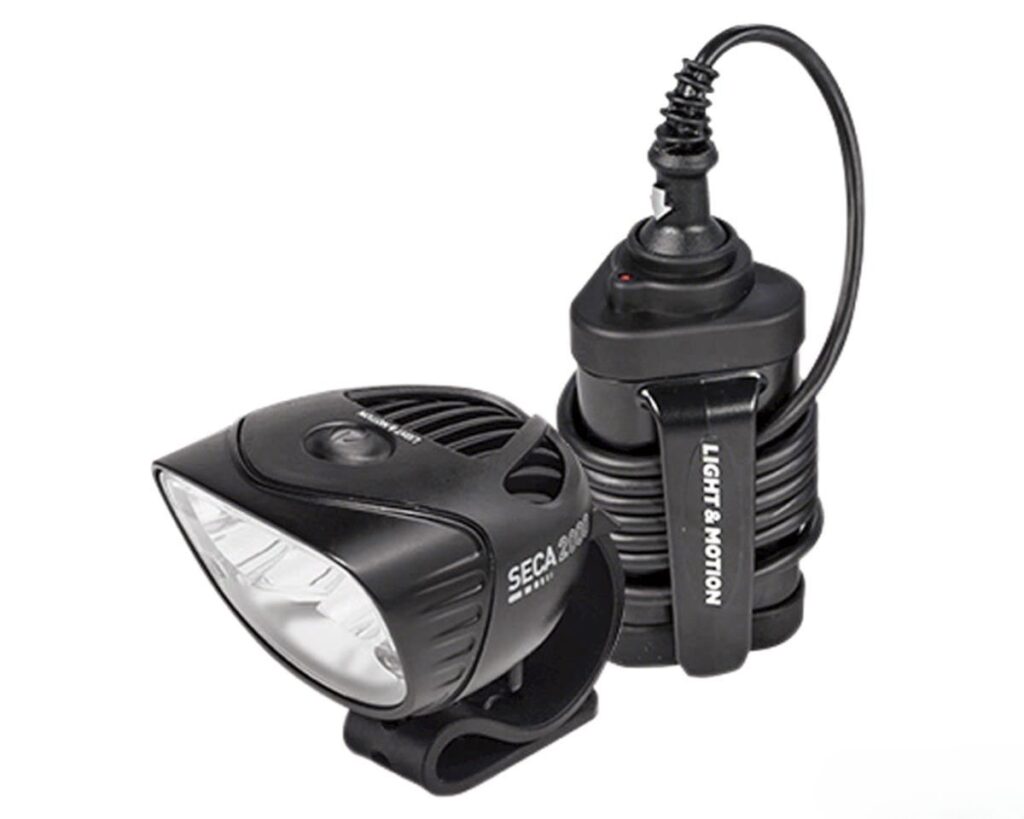
- LUMENS: 500, 1000, 2000
- MODES: 4—Safe Pulse, Low, Medium, High
- BATTERY: 3-cell Li-ion pack
- RUNTIME: 90-720 minutes
- WEIGHT: 355g
- USAGE: Optimized beam pattern with a high output to turn night into day
- PRICE: $324.99
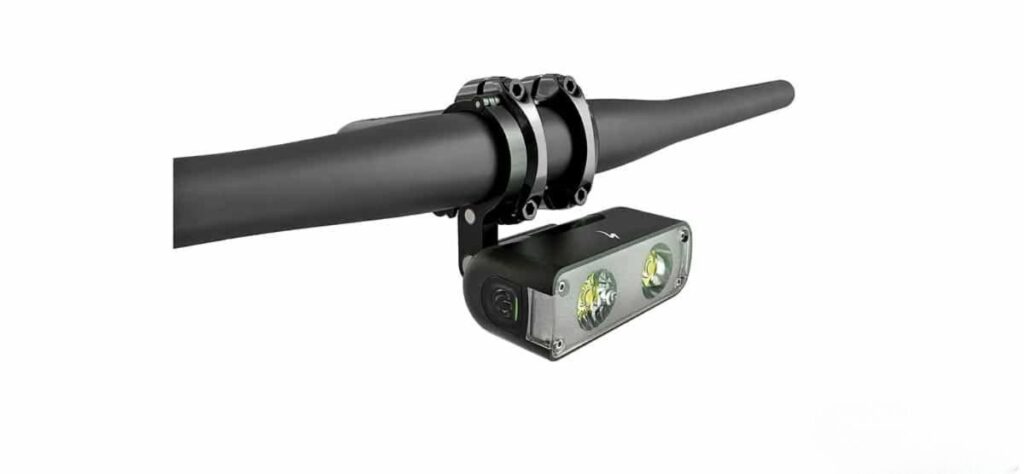
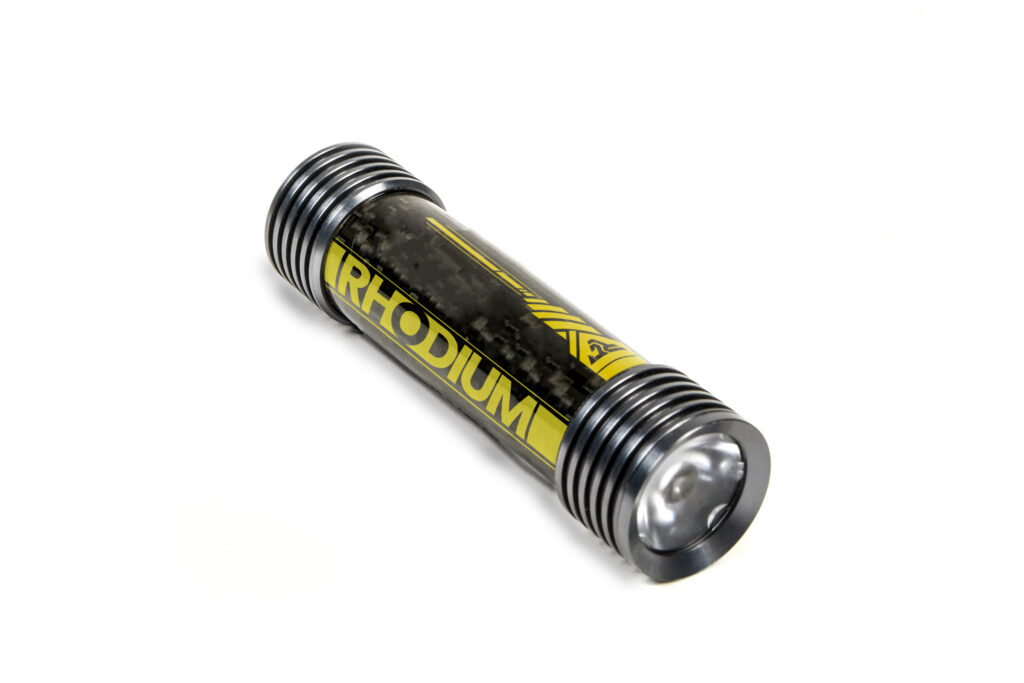
SPECIALIZED FLUX 850 HEADLIGHT
- LUMENS: 50, 100, 250, 400, 450, 850
- MODES: 8—Super Low, Very Low, Daytime Flash, Steady Flash, Low, Medium, High
- BATTERY: Internal Li-ion
- RUNTIME: 90-120 minutes
- WEIGHT: 142g
- USAGE: Ideal for handlebars with the widespread optic design, but it can also be mounted on a helmet. It’s worth noting that they have yet to make a 35mm clamp design.
- PRICE: $80

- LUMENS: Adjustable up to 100
- MODES: 10 different programs in High, Medium, Low
- BATTERY: Internal Li-ion
- RUNTIME: 1.5—36 hours
- WEIGHT: 93g
- USAGE: Expensive but ideal for using on the helmet, given its light weight and multiple output settings.
- PRICE: $324.99
- LUMENS: 250, 450, 750, 900
- MODES: 8—Day Flash, Night Flash, Medium w/ Flash, Low, Medium, High
- BATTERY: Internal Li-ion
- RUNTIME: 1.5-12 hours
- WEIGHT: 84g
- USAGE: An affordable, ultra-lightweight option for the helmet of handlebars that is made in the U.S.A.
- PRICE: $84.99

2. Set Up the Bike During the Day
Now that you’ve got some proper lights, take the time to learn how they function and mount to your bike/gear during the daytime. Having a plan is key, so you are not fumbling around in the dark to go out for a ride. This is a great time to make sure your light mounting brackets are not out of place or becoming loose. It is never fun to hit that first bumpy trail section and have your light fall off. It is also important to ensure that the light mounted to your helmet is under the padding or not restricting a protection liner like MIPS.
3. Wearing the Right Gear
It is colder at night, so it is important to plan accordingly and be updated on the weather conditions you may encounter. A packable jacket, head sock, thicker gloves, cozy socks, and even an emergency blanket are all practical gear choices that could be useful in the dark mountains. While wearing shades helps protect against the sun, having a pair of glasses with a clear lens is worth keeping your eyes out of danger from any unwanted debris.
4. Ride Familiar Trails
While we encourage having a mapped plan to explore new trails, it’s best to stick with routes and areas you are familiar with for night riding. Twilight can make things look unfamiliar, so having prior knowledge is fundamental so you don’t take a wrong turn and get lost in the woods. A phone can be handy for looking up maps, but a dedicated cycling GPS will help get you back on the right track if service is unavailable.
5. The Buddy System
While riding alone can be tranquil, getting some buddies to ride with you is more fun and safer in case someone takes a tumble. If no one is ready to ride and you must get out, at the very least, tell someone where you are going and give them an idea of when you should be back safely. If adventuring alone is something you do regularly, then it’s worth setting up an app that’ll ping your location, such as Strava’s Beacon or a Global Hotspot from Somewear Labs. We’ve been using these apps just in case of an SOS situation.
6. Don’t “Send It” Off Jumps
Unless you know the trail and the feature like the back of your hand, it’s best to save the booters for when they can be examined in the daytime. If you try some new jumps, remember that spotting a landing can be nearly impossible when your lights get pointed up and away from the trail. Low light can also skew a rider’s judgment of speed, gaps, gradients, and the distances needed to travel.
7. Be Aware of Your Beam
These high-output lights are no joke at the full-power output. Shining your lights into other riders’ faces could blind them. Avoid this by looking at your riding companion’s feet or altering the beam’s direction with your hand. There are also situations where you might need to dial the power down because the high-lumen lights can bounce back off the path’s foliage, causing a glare. And last, we all love trailing behind a riding partner during the day, but at night, intense light from behind will form a shadow or dark patch for the rider out front. Backing off and giving the rider ahead of your space is necessary to avoid unwanted accidents in the dark.
8. Getting Smart
Beyond remembering to charge your lights, learning to manage the battery life during the ride is also important. We tend to use the helmet and handlebar lights on full power for fast or technical trails, but that can eat into the battery life, so it is best to drop your main light to a low power setting when riding easier sections of the trail. We even completely turn off the helmet light when climbing and use the bar light at the lowest output. Bring a third backup light if your ride may run longer than your two lights can last at the highest output setting. If you are taking a break, shut off your lights. Most cycling lights, especially the higher-lumen options, are designed to keep cool via airflow to avoid overheating.
There is no doubt that trails can be a blast at night. To keep the stoke alive, we hope these easy-to-follow tips become part of your night-riding routine.
